My Homelab Setup
Introduction
For a long time, I have wanted to build my own homelab to deploy my projects. Since OpenClaw was published, the urge to set it up became even stronger.
Specifications Homelab
| Host | Intel NUC11PAHi3 |
| CPU | Intel i3-1115G4 |
| Memory | 20GB (Later Upgrade to 24GB) |
| Storage | 256GB |
Install Proxmox
Previously, I planned to install Ubuntu Server as the main OS for the homelab but my coworker suggest me to try Proxmox and then i search about it and i think proxmox is suitable for my homelab which Proxmox is web-based for the OS for the interface so easy to manage Virtual Machine and LXC and there’s many helper script to set up post install or install LXC/VM. Here’s the resource allocation for every LXC installed
| Proxmox | - 67GB Disk - 192.168.1.231 IP Address |
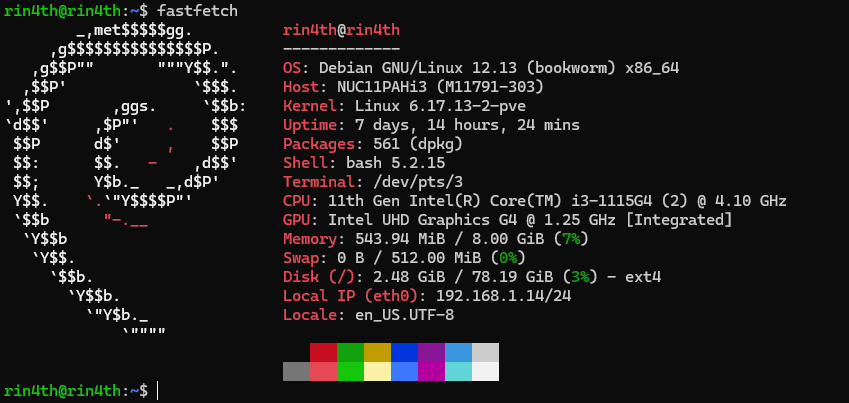
| Casa OS | - 2 vCPUs - 8GB Memory - 80GB Disk - 192.168.1.14 IP Address |
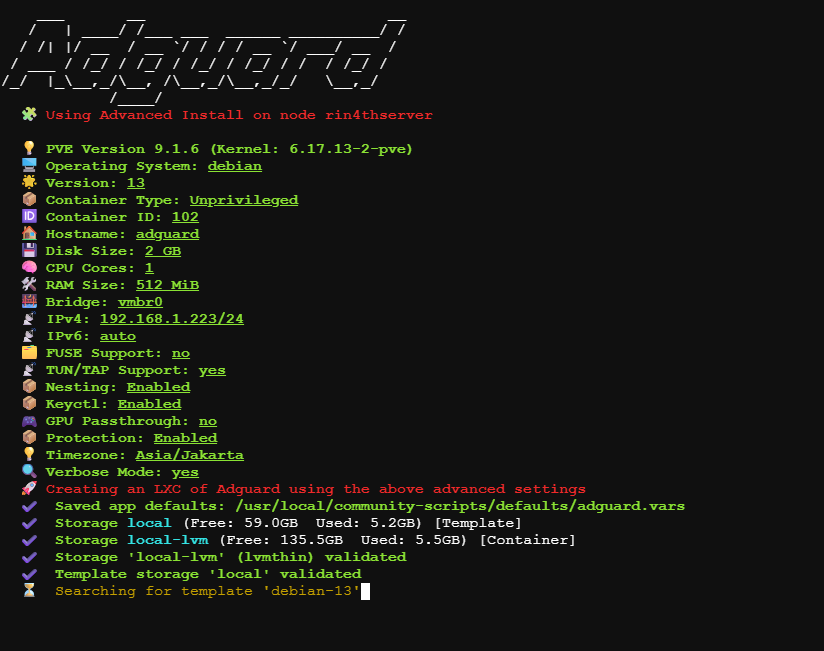
| Adguard | - 1 vCPUs - 512MB Memory - 2GB Disk - 192.168.1.223 IP Address |
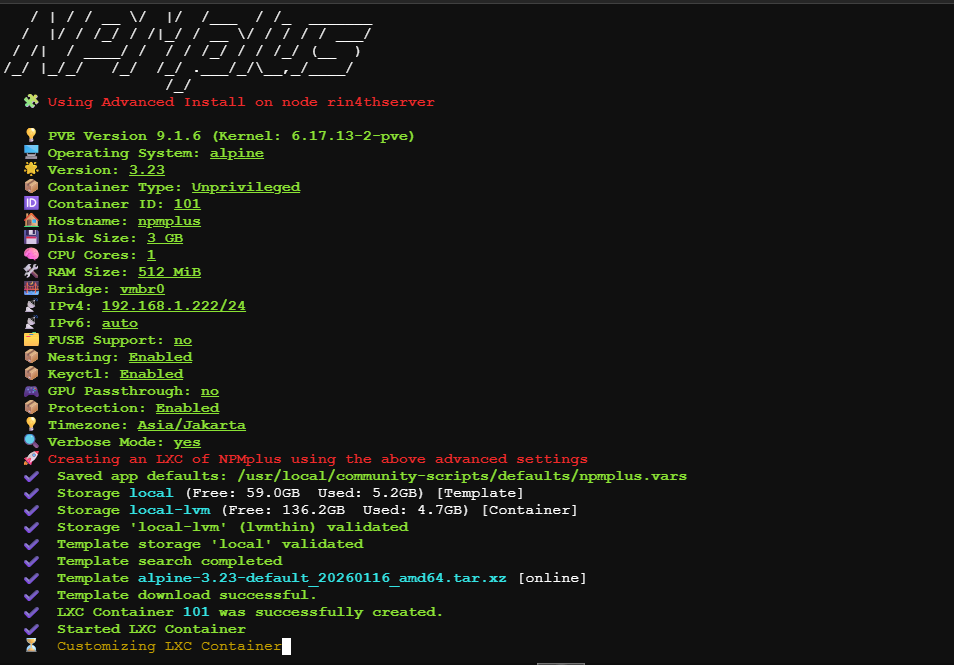
| NPM Plus | - 1 vCPUs - 512MB Memory - 3GB Disk - 192.168.1.222 IP Address |
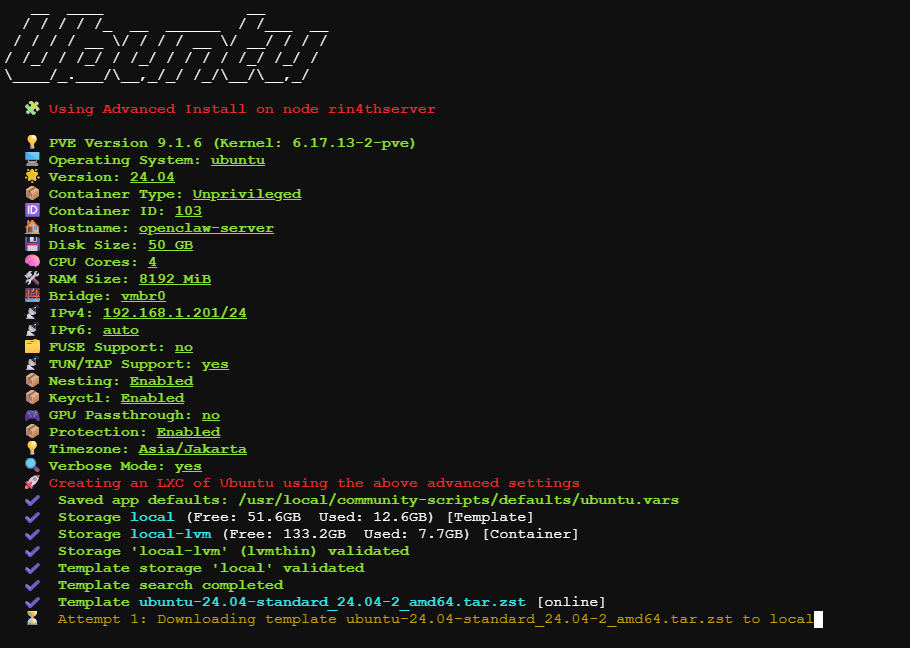
| Ubuntu for OpenClaw | - 4 vCPUs - 8GB Memory - 50GB Disk - 192.168.1.201 IP Address |
Before setup every LXC and VM set up post install Proxmox, and we can use this helper script

Install VM & LXC
Install Casa OS
Actually i didn’t know about this OS, but after watching this video which CasaOS is Debian based and has some feature that can help me for NAS such as Web-Based Interface, File Manager Web-Based. To install Casa OS can use this helper script. I’ll use this LXC to deploy every my project in the future
Install Adguard
The reason I installed AdGuard is so that when I access my homelab, I don’t need to enter an IP address. I wanted to access it using my subdomain rzl.app, even though these records only exist on my local DNS Server. To install Adguard can use this helper script
Install NGINX Proxy Manager Plus
To make it look like a real website using only a domain name without a port, I installed NPM Plus as a Reverse Proxy. To install NPM Plus can use this helper script
Install Ubuntu
Now I want to install another Ubuntu for my Openclaw, i ask gemini that it’s recommended to install Openclaw on another LXC so it can more safe. Using this helper script
Network Configuration
My plan is to make my homelab accessible in anywhere but in private network, previously i wanted to use native wireguard but found that it required a public IP, since then discussing with gemini and ask my friend Tailscale is solution for my case.
Setup Tailscale
I used Tailscale as a Subnet Router on Host Proxmox, so it doesn’t need to install tailscale on every LXC or VM. By installing tailscale using this command
tailscale up --advertise-routes=192.168.1.0/24 --accept-dns=falseNote
- —advertise-routes: This tells Tailscale to route traffic for the 192.168.1.x subnet through this Proxmox node.
- —accept-dns: This prevents Tailscale from overriding the system’s local DNS settings, allowing my local configuration to stay intact.
Don’t forget to add nameserver on Tailscale DNS Setting with IPv4 of Adguard with split domain name is internal.rzl.app, so whenever client go to dns with internal.rzl.app it will through to IPv4 of Adguard (e.g pve.internal.rzl.app).
Setup Adguard
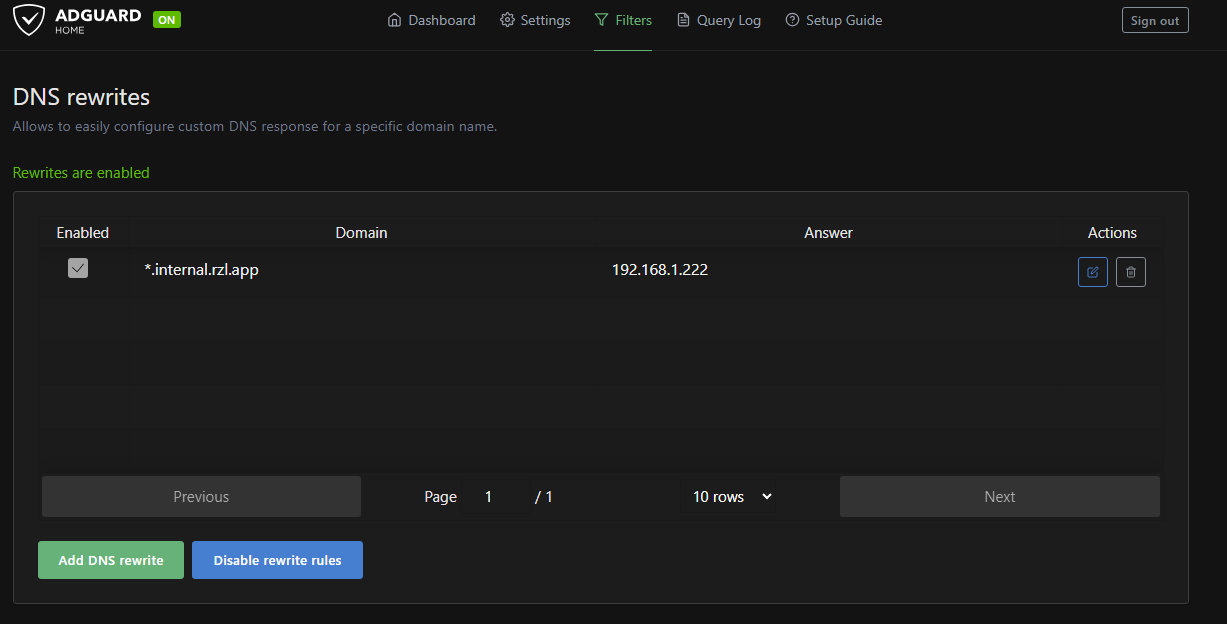
On Adguard add DNS Rewrites on Filters Menu with wildcard *.internal.rzl.app and IP Address of NPM, which will make every request to *.internal.rzl.app will resolved to IP of NPM.
Setup NPM
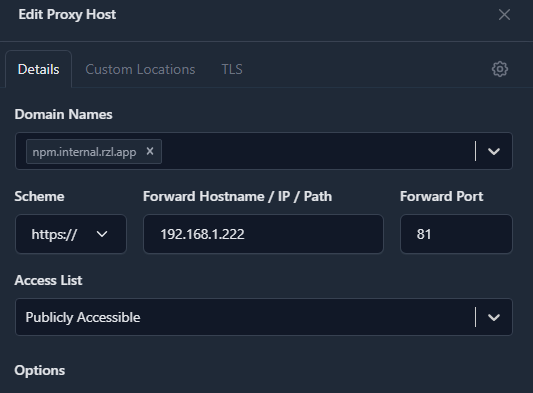
Next, I added a new Proxy Host. I entered my desired Domain Name and pointed it to the internal IP and Port of the service I wanted to reach. NPM then forwards the traffic to the appropriate container. I set the Scheme to https for services that already use SSL.
Under the TLS menu, I selected “Request a new Certificate” and enabled Force HTTPS and Use DNS Challenge. I had to use the DNS Challenge method because it allows me to prove domain ownership to the Certificate Authority (CA) without having to open Port 80 to the public internet.
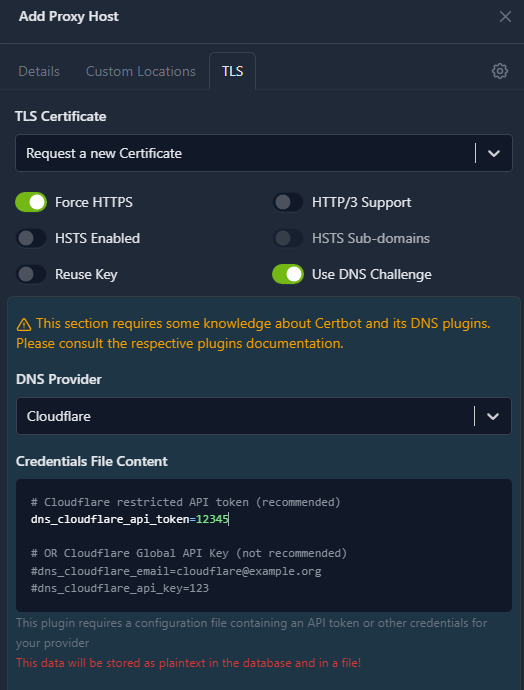
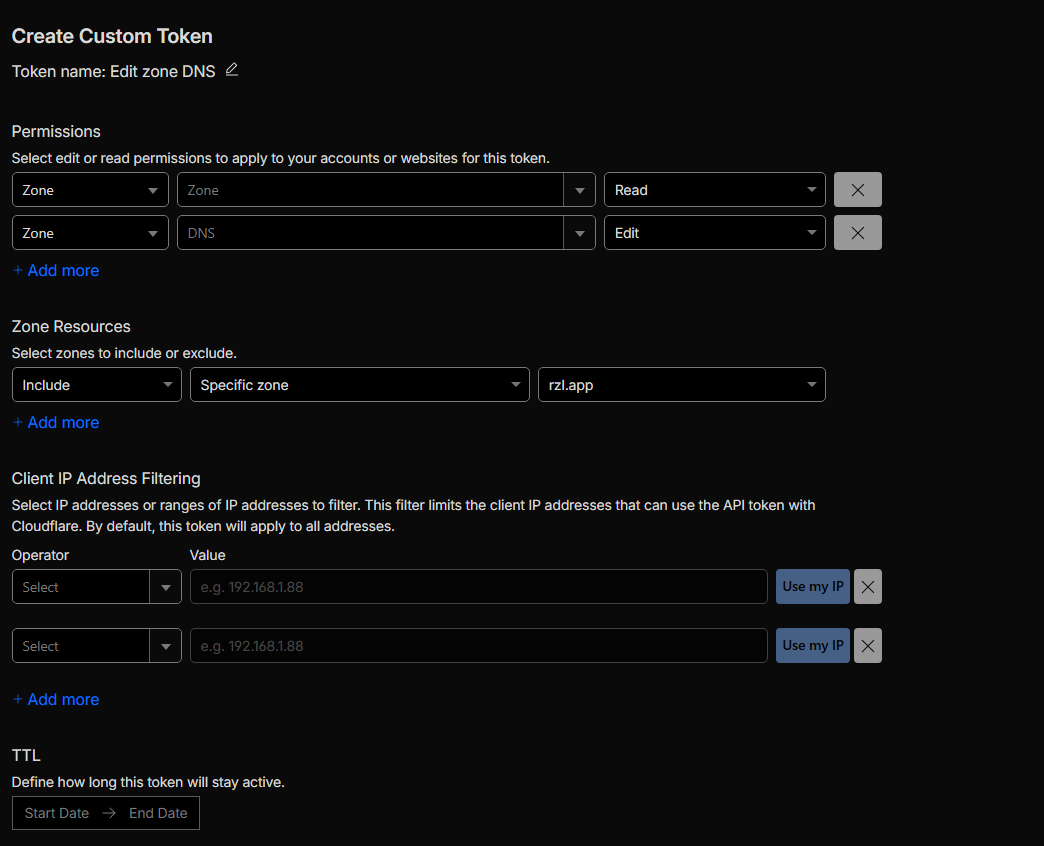
Since I use Cloudflare to manage my DNS, I created a scoped API Token using the “Edit zone DNS” template. I then pasted this token into the dns_cloudflare_api_token field in NPM and saved it.
Finally I can access my homelab from any network via Tailscale by simply typing the domain into my browser with the HTTPS scheme.

Conclusion
Even though there’s a Cloudflare tunnel feature to make it secure on public, but i don’t want to make my homelab accessible public, and by implementing HTTPS, I’ve added a layer of encryption in transit, ensuring my traffic is protected against Man-in-the-Middle (MITM) attacks within my private network. It sound like overkill but I don’t care, I learned something new on this project. For future work, I’ll implement Cloudflare Tunnels for projects that I want to deploy to the public.